
Whole-House Repiping: Step-by-Step Guide for Northern Virginia Property Owners
Hello, I’m a certified plumber, and I’ll walk you through what to expect during a whole-house repiping.
This process covers repiping your bathroom, kitchen, and basement plumbing lines.
My goal is to explain each step in an authoritative yet friendly way so you feel comfortable and informed about how we’ll upgrade your home’s pipes.
1. Initial Inspection & Planning
The first phase is all about understanding your current plumbing and planning the project:
- Assessing the Current System: I begin with a thorough inspection of your existing plumbing. This means checking the pipes in the basement, behind bathroom walls, under the kitchen sink, and anywhere pipes run. I’m looking for signs of leaks, corrosion, low pressure, or outdated materials (like old galvanized or lead pipes). This helps us identify all problem areas and decide the scope of the repipe.
- Selecting Materials (PEX, Copper, CPVC): Next, we’ll discuss the best piping material for your home. There are a few common options, each with its benefits:
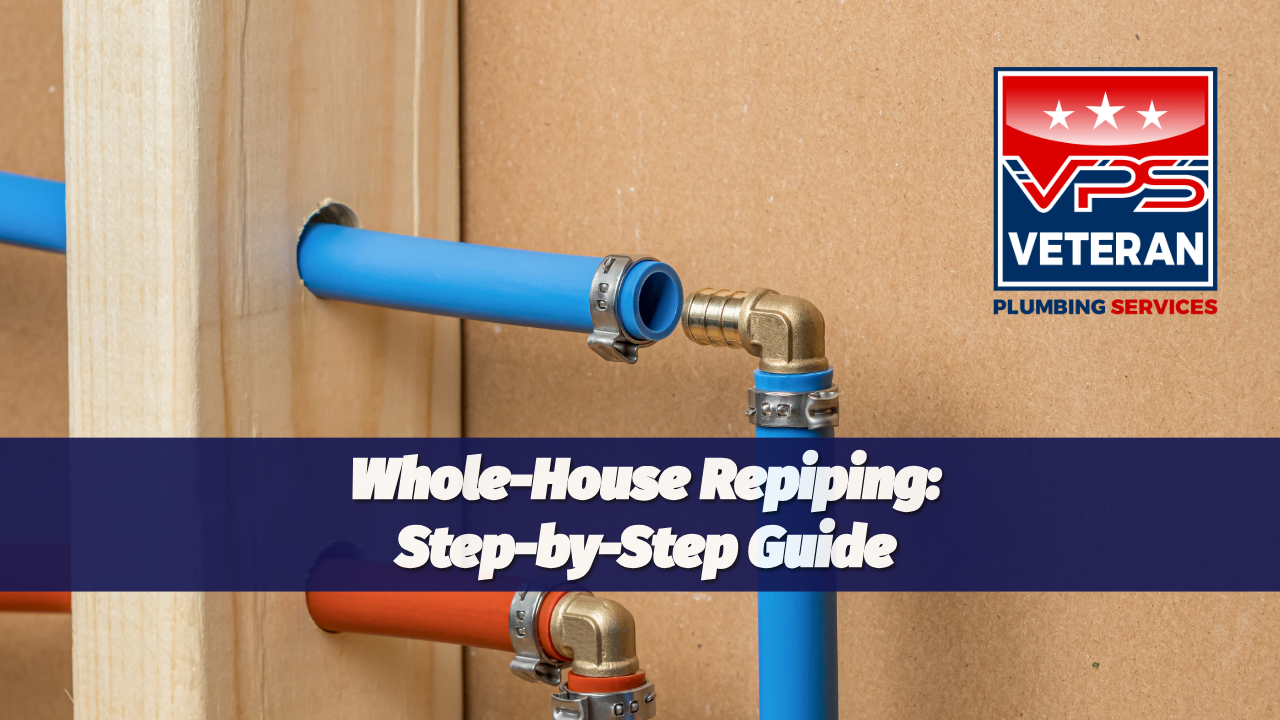
- PEX (Cross-Linked Polyethylene): A very popular choice for repiping because it’s flexible and can be installed with fewer connections. PEX won’t corrode and is often more affordable than metal pipes. Its flexibility allows faster installation with less wall demolition.
- Copper: A traditional choice known for durability and a very long lifespan. Copper pipes can handle heat well and aren’t prone to sagging. However, they do require soldering and can be more expensive in both material and labor.
- CPVC (Chlorinated Polyvinyl Chloride): A type of plastic pipe that doesn’t corrode and is easier to install than copper (uses solvent glue, no welding). CPVC is rigid, so more fittings may be needed than PEX, but it’s still a reliable, budget-friendly option in many cases.
I’ll recommend the material that best fits your home’s needs and your budget, and I’ll explain why that choice makes sense (often PEX is recommended for its flexibility and speed, but every home is different).
- Routing and Access Planning: With the material decided, I map out the new pipe layout. The goal is to run new pipes in the most efficient way with minimal damage to your walls and floors. I’ll determine strategic access points – for example, openings in drywall behind a bathroom or in the basement ceiling – so we can reach and replace pipes in the kitchen, bathroom, and any other areas. Planning the route also involves figuring out where we can snake pipes through framing or along beams to cover the whole house with as few open-ups as possible. We also plan how to maintain water service in key areas when possible (sometimes we can set up a temporary kitchen or bathroom water line during the project).
- Permits and Codes: If a plumbing permit is required in your area (many municipalities require one for a whole-house repipe), we’ll handle the paperwork and get the necessary permit before work starts. We make sure our plan meets local building codes. Later on, an inspector might need to check the work – but don’t worry, we coordinate inspections as part of the job so everything is up to code and approved.
2. Preparation & Site Protection
Before we remove a single pipe, we take steps to protect your home and ensure safety:
- Shutting Off Water Supply: On the scheduled day, the first thing we do is turn off your home’s main water valve. We’ll give you a heads-up to prepare (fill some containers with water for essentials, etc.). Once the water is off, we drain the faucets to empty out the lines. This means opening all taps (and flushing toilets) to let any remaining water escape so the pipes are clear for work.
- Protecting Floors and Belongings: We treat your home with care. Before cutting or removing anything, we cover floors, countertops, and furniture with drop cloths or plastic sheets. In the bathroom and kitchen, for example, we’ll put down protective coverings over tiles and hardwood, and in the basement we might lay down tarps where we’ll be walking. This containment keeps dust and debris off your belongings. We’ll also wear shoe covers or lay down pathways as needed to avoid tracking dirt through the house.
- Access Point Setup: With the water off and home protected, we create access to the hidden pipes. This involves carefully cutting small openings in drywall, ceilings, or floors at the pre-planned points. We only open up the areas necessary to reach the pipes. For instance, we might cut an access panel behind the shower wall or under a bathroom sink, or a section of the kitchen wall behind the cabinets, and in the basement ceiling if pipes run there. Each cut is precise and controlled to minimize damage. If the basement is unfinished, we may have easier access to exposed pipes there, which is a plus. Rest assured, any sections of wall or ceiling we cut will be patched up later on.
By the end of this prep stage, the water is off, your home is protected, and we have clear access to all the old pipes that need replacement.
3. Removing Old Pipes
Now comes the removal of the old plumbing lines throughout the house:
- Draining and Disconnecting: Even though we drained the system earlier, we double-check that each section of pipe is empty before removal. We might use a small pipe cutter or reciprocating saw to cut into a pipe and let any last drips out into a bucket. Then we systematically disconnect the old pipes. In the basement, this could mean unscrewing old galvanized lines or cutting out old copper. On upper floors (bathroom/kitchen), we carefully cut away pipes from behind walls or under sinks. We take care around electrical wiring or other systems while doing this.
- Safe Removal: We remove the pipes in manageable sections. If the pipes are metal (like iron or copper), we cut them into lengths that are easy to carry out without knocking into walls. For example, in a bathroom wall, we might cut an old vertical pipe into two or three pieces to pull it out safely. Each old pipe segment is removed and handed off to a crew member to be carried outside. We also cap or cover any open pipe ends temporarily to prevent debris from falling in. During removal, we’re cautious to not damage structural parts of your home – it’s a bit like surgical precision, taking out the old pipes while leaving the surrounding structure intact.
- Disposal of Old Piping: All the old pipe materials are taken out to be disposed of properly. We usually stack the old pipes outside for hauling. If the material is recyclable (like copper or metal), we’ll set it aside for recycling. If it’s something like old CPVC or polybutylene, we’ll dispose of it according to local regulations. Your home will be free of those deteriorating old pipes. This removal phase can be noisy (due to cutting) and might cause some dust, but our earlier prep (coverings and sealing off areas) helps contain that.
With the old pipes gone, we have a clean slate to start installing the new, improved plumbing system.
4. Installing New Pipes
This is the core of the project – putting in the brand new pipes throughout your bathroom, kitchen, basement, and everywhere in between:
- Running New Lines: We install the new pipes following the layout we planned. If we’re using PEX, we often run longer continuous lines since it’s flexible (fewer joints mean fewer potential leak points). These lines might run from a central manifold or the water heater out to each fixture. In a copper or CPVC installation, we’ll cut and join sections as we go, more like the old system but with new materials. We start typically in the basement or where the water enters the house, then branch out to the kitchen, bathrooms, and other fixtures. Pipes are fished through walls and joists; for example, a new cold water line might go up from the basement to the bathroom sink, or across the attic and down into a kitchen wall for the sink line.
- Proper Fittings & Supports: As we put in the new pipes, we secure them and make solid connections. We use the appropriate fittings for the material – crimp or expansion fittings for PEX, soldered joints for copper, solvent weld (glue) for CPVC. Every joint is made carefully to ensure a tight seal. We also fasten the pipes with supports (pipe hangers or clamps) at regular intervals so they stay put and won’t sag or rattle. This is especially important in the basement and behind walls. Proper strapping prevents that annoying pipe banging (water hammer) and keeps everything neat. We follow all manufacturer guidelines and local plumbing codes during installation, so the system not only works well but is built to last and pass inspection.
- Connecting to Fixtures: Once the main lines are run, we connect the new pipes to all your fixtures and appliances. This means hooking up the kitchen sink, dishwasher, refrigerator water line, all bathroom fixtures (toilet, sink, shower/bathtub), and any laundry or utility sinks in the basement. Each fixture gets new supply lines for hot and cold as needed. For instance, in the bathroom we’ll connect the new hot and cold PEX lines to the faucet and shower valves using proper adapters. In the basement, we’ll tie the new pipes into your water heater (connecting the cold water inlet and hot water outlet with the new piping system) and to the washing machine connections. We also replace or reconnect any shutoff valves under sinks and behind toilets with new ones, so you’ll have fresh, easy-to-operate valves for maintenance. Every connection is double-checked for correctness – hot to hot, cold to cold – to avoid any mix-ups.
At this stage, the new piping system is in place throughout the house. All the bathroom, kitchen, and basement water lines have been replaced with modern materials, and everything is hooked up where it should be.
5. Pressure Testing & Inspection
Before we close up the walls, we need to make sure the new system is solid:
- Pressure Testing for Leaks: We thoroughly test the new pipes to ensure there are no leaks. This typically involves turning the water supply back on partway (or using air pressure in the lines in some cases) to pressurize the system. We check every new joint and connection we made. I’ll go to each bathroom faucet, kitchen faucet, etc., and visually inspect for any drips. We often leave the system pressurized for a while and watch the pressure gauge – if there’s any drop in pressure, it could indicate a small leak that needs fixing. Essentially, we only move forward once we’re confident everything is leak-free and holding strong pressure (Amped Home Services | Professional Repiping in OKC Metro Area). If we find any issue, we address it immediately (tighten a fitting, re-solder a joint, etc., depending on the material).
- Ensuring Balanced Water Pressure: During testing, we also verify that water flow and pressure are balanced throughout the house. This means that when we turn on multiple fixtures (say, a shower and the kitchen sink), the pressure stays strong. New pipes should improve any previous pressure problems, so we check that you’re getting the expected boost in water flow. We also make sure hot water is reaching all fixtures (checking that the hot lines were purged of air and are functioning).
- Municipal Inspection (If Required): If your local government requires a plumbing inspection for the repipe (which is common when a permit is pulled), this is the stage where it happens. We’ll schedule the inspector to come evaluate the work. The inspector will look at the newly installed pipes (which is why walls are still open in spots) to ensure everything meets code and was installed properly. Since we follow code guidelines during installation, this inspection typically goes smoothly. I’ll walk the inspector through what we did, they may check things like pipe strapping, the type of materials used, and that proper permits are in place. Once we get the green light (approval) from the inspection, we can proceed to wrap up the project. If no official inspection is required, we proceed after our own internal quality checks.
6. Closing Up & Finishing Work
With new pipes installed and tested, we turn our attention to restoring your home to normal:
- Patching Walls and Ceilings: All those access holes we made in drywall or ceilings will be carefully patched up. We reattach any cut-out drywall pieces or, if needed, install new drywall for larger openings. Then we tape, mud (apply joint compound), and sand the patches to make the walls smooth. After that, we’ll texture and repaint the repaired sections to match the surrounding area. The goal is that you won’t be able to tell where we opened the walls in the first place. In areas with special wall finishes (like bathroom tile), we will have discussed beforehand how to handle it – sometimes tiles can be removed and reinstalled. We make sure any bathroom or kitchen wall we had to open looks as good as new.
- Floor and Fixture Restoration: If we had to move any fixtures (like a vanity or a water heater) or floor boards to access pipes, we put everything back in place. For example, in the basement, if we had to temporarily detach a section of drywall ceiling or move aside an appliance, we’ll put that back. We ensure toilets are re-bolted if they were moved, and sinks are back in position with all new supply lines connected. Basically, we double-check that every fixture (shower, sink, toilet, dishwasher, washing machine, etc.) is securely in place, properly connected, and sealed as needed. Any holes in floors (which is uncommon for water repipes, more so for drain repipes) would be filled and patched as well.
- Clean-Up: Our team does a thorough cleanup of all work areas. We remove the floor coverings and drop cloths carefully to trap the dust, then vacuum or sweep up any remaining debris. All old pipe scraps, packaging from new pipes, and any miscellaneous debris are taken out to the trash. We’ll dispose of or recycle the old pipes as appropriate. We strive to leave your home as clean as we found it, aside from the necessary wall repairs which we’ve already handled. After cleanup, we will turn your water supply fully back on (if it was left off after testing) and ensure everything is functioning.
At this point, your home’s repiping is complete – you have an entirely new piping system in your bathroom, kitchen, basement, and throughout the house, and the walls and floors are restored.
7. Final Walkthrough & Homeowner Education
Finally, we make sure you’re comfortable with your new plumbing system:
- Walkthrough and System Check: I will walk through the house with you and show you what was done. We’ll go to the bathroom, kitchen, basement, and any other repiped areas to inspect together. I’ll point out any new shut-off valve locations or access panels. We’ll test each fixture in your presence – turning on faucets, flushing toilets, running the shower – so you can see the improved water pressure and hear the absence of any old pipe noises. This is your chance to see everything working and ask any questions while we’re there together.
- Explaining Improvements: I’ll explain how the new system improves your home. For example, if you previously had galvanized pipes that gave rusty water or low pressure, you’ll now have clean, free-flowing water thanks to the new PEX or copper lines. If certain changes were made (like a manifold system with PEX), I’ll show you how that works. The idea is to help you understand the benefits: no more frequent leaks, better water clarity, stable water temperature, and overall reliability. I want you to feel the upgrade was worthwhile.
- Maintenance Tips: Even though your new pipes won’t need much maintenance, I’ll give you some pointers to keep everything in good shape. This might include tips like: don’t ignore small leaks (though unlikely anytime soon with new pipes), how to shut off the water quickly in an emergency (reviewing where the main shutoff is and any fixture shutoffs), and perhaps seasonal advice like leaving a trickle of water on very cold nights if your area freezes (since even new pipes need protection from extreme cold). If we installed special features like expansion tanks or water hammer arrestors, I’ll explain their purpose. For a PEX system, I might mention that the pipes can expand a bit with hot water – that’s normal. Essentially, I’ll let you know what to expect and how to care for the new system.
- Warranty and Support: All our workmanship and the materials we installed come with warranties, and I will make sure you have that information. I’ll also remind you that you can call us if you have any concerns or questions after we leave. Our goal is your long-term peace of mind — we stand by our repiping work. If down the road you plan any renovations or have issues, we’re here to support you.
By the end of the walkthrough, you should feel confident in your newly repiped home. You’ll know what was done, why it was done, and how to take care of your upgraded plumbing.
With new pipes in your bathroom, kitchen, basement, and throughout the house, you can enjoy improved water flow and reliability for many years to come.
If you have any questions at any point, just ask — as your plumber, I’m here to help you understand and feel comfortable with your home’s plumbing system.
